Excel Tutorial: How to use VBA to delete filtered rows (fast!!) … but not delete hidden rows
Last updated on February 20, 2018 By Victor Chan

Use VBA to delete filtered rows fast…
A couple of weeks ago, I got a question from Svetlana on my YouTube channel.
Svetlana has a worksheet with filtered data and wants to know how to delete visible filtered rows and leave hidden rows intact.
Sure, it’s possible to do this quite easily using Excel’s built-in menus >> select data, set auto-filter, apply filter criteria, select rows to delete, go to special “visible cells only”, delete, reset the filter to show remaining records…
But if you do this repeatedly it can be time-consuming and error-prone!
With a bit of help from the VBA programming language (note: VBA stands for “Visual Basic for Applications”) we can automate the process.
Making it as fast as clicking a button – and removing the potential for human error.
Here’s a 14 minute video to show how…
The video shows two VBA subroutines with a walk-through commentary of how they work:
Delete visible filtered rows – Apply an auto-filter to the data range and then delete visible rows we do not want to keep (in this spreadsheet delete all rows with “CD” in column J that also have blanks in column D)
Delete hidden filtered rows – Apply an auto-filter to the data range and then delete hidden rows, leaving only the visible rows (in this spreadsheet keep all rows with “CD” in column J that also have blanks in column D and remove all other rows)
You can watch this video below. You can also watch full screen – hover over the embedded video and click on the “Full Screen” button on the bottom-right corner.
Click here for the full video transcript.
Note: You can also turn on the Subtitles in the video above… hover over the embedded video and click on “CC” near the bottom-right corner.
Download the Sample Workbook

To follow along with the video and article you can download the Sample Workbook “20180118-Delete-Filtered-Rows.xlsm” by clicking here
When you open the workbook you need to allow Macros to run. Otherwise Excel stops the VBA code from running.
Note: the sample workbook has been tested on Excel 2016 (Windows 32-bit, English language version) and you might get different results in other version of Excel. If you find that you can’t use this workbook on your version of Excel, please let me know using the comment section below.
Here’s the VBA code
If you just want to copy and paste the code without downloading the sample workbook, here it is:
Option Explicit
Sub Delete_CD_Blanks()
'Delete all rows with "CD" in column J
'that also have blanks in column D
Dim Rng As Range
Dim Rng_Del As Range
'Reset the Sheet
Call Reset_Sheet
'Apply autofilter to data rage
'Note: data must start in cell A1 for this macro to work
Set Rng = Range("A1").CurrentRegion
If wks_Working.AutoFilterMode = True Then
wks_Working.AutoFilter.ShowAllData
End If
Rng.AutoFilter field:=4, Criteria1:="="
Rng.AutoFilter field:=10, Criteria1:="CD"
'Delete visible rows assuming there's nothing else below the last row
Rng.Offset(1, 0).SpecialCells(xlCellTypeVisible).EntireRow.Delete
wks_Working.AutoFilterMode = False
End Sub
Sub Keep_CD_Blanks()
'Keep all rows with "CD" in column J
'that also have blanks in column D
'and remove all other rows
Dim myCell As Range
Dim Rng As Range
Dim Rng_Del As Range
'Reset the Sheet
Call Reset_Sheet
'Apply autofilter to data range
'Note: data must start in cell A1 for this macro to work
Set Rng = Range("A1").CurrentRegion
If wks_Working.AutoFilterMode = True Then
wks_Working.AutoFilter.ShowAllData
End If
Rng.AutoFilter field:=4, Criteria1:="="
Rng.AutoFilter field:=10, Criteria1:="CD"
'Delete hidden rows
For Each myCell In Rng.Columns(1).Cells
If myCell.EntireRow.Hidden Then
If Rng_Del Is Nothing Then
Set Rng_Del = myCell
Else
Set Rng_Del = Union(Rng_Del, myCell)
End If
End If
Next
If Not Rng_Del Is Nothing Then Rng_Del.EntireRow.Delete
wks_Working.AutoFilterMode = False
End Sub
Video Transcript
Hello and welcome to Launch Excel. I’m Victor, and in today’s video, we’re going to have a look at a viewer request from Svetlana. Svetlana a couple of days ago asked, “How to delete rows if I want to sort by more than one column and delete rows that match more than two or three of my filters?”

[00:25] Viewer Request
As an example, she says, “I have a sheet that in Column J I have text DS, CD, SS, WB.” Down here, Column J, DS, CD, SS, WB. Now this could be in any order, I guess, and the VBA that does this, the macro code that does this doesn’t care about what order it’s in, and it could be many more rows down below, but this is just for illustration’s purpose. In Column D, you have blanks for different texts. In Column D here, you’ve got blanks here and non-blanks. That non-blank could be any text whatsoever. This is blank, blank, blank, blank, blank and blank.

[00:56] Rows to delete highlighted in yellow
What Svetlana would like to do, if I read this correctly, is she’d like to delete all the rows that had CD in Column J, so CD, this one, this one, this one, this one, these four have CD in Column J, and match only the blanks from Column D, so blanks and CD, just the ones I’ve highlighted in yellow. Those two she’d like to delete, he or she, Svetlana, I presume you’re a she, but I don’t know, but he or she would like to delete.
“I would not like to delete rows that had, for example, Text WB in Column J and blanks in Column D.” What we’ll do is we shall take a look at using VBA, which is Visual Basic for Applications in Excel, and this is a way to automate your Excel programs. If you’re not already familiar with it, it’s a really powerful tool and it’s underutilized by many people. Here’s an example of how to use it.

[01:46] VBA is a very powerful tool…
As a solution, we’re going to use Excel VBA, which is Visual Basic for Applications, to apply an auto-filter to the data range and then delete the rows we do not want to keep. This is going to delete the visible rows. I’m going to have one solution there.
I’m also going to do the opposite. Instead of deleting the visible rows, I’m also going to show you how to delete the hidden rows, and that’s slightly more complicated and uses a different construct in VBA, but I’ll show you both ways. If you want to keep the rows that are blank in Column D and have CD in Column J, what we’ll do is apply an auto-filter to find the blank cells in Column D and the cells with CD in Column J, and then we’ll delete the hidden rows.
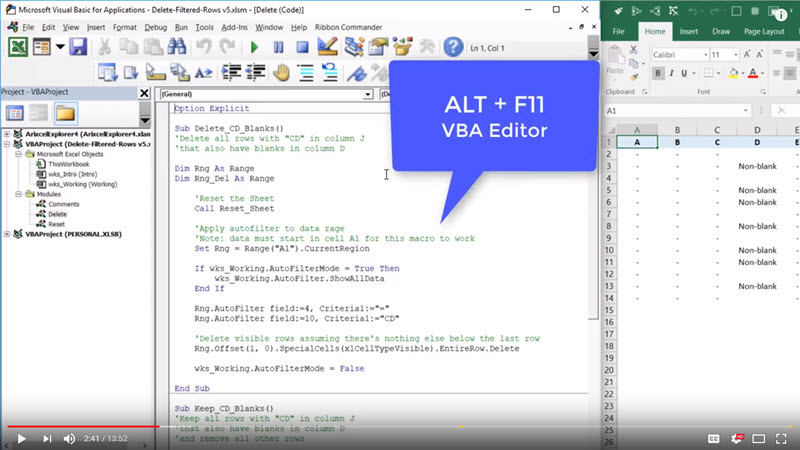
[02:41] Access the VBA Editor by pressing ALT + F11 in Excel
On to the VBA. Here on the left I’ve got the Excel VBA editor open. To access this, you press ALT and F11 as a keyboard shortcut. Once you’re in here, you can see in the spreadsheet I have something called a subroutine. This is a macro piece of code that you run. What it does is it’s going to delete the CD blanks. So delete all rows with CD in Column J that also have blanks in Column D.
Now I’ll give you a demonstration on the right here how it works. This is the actual worksheet. It’s called Working. When I press one of these buttons, it’s going to run on a macro. This first one will run Macro 1, Delete Blank-CD. I press that.

[03:00] Sample Worksheet showing Form Buttons that when clicked will trigger VBA Macros
Before I press it, actually, I’ll just highlight the rows which are blank and CD. Here and here, I will highlight them in yellow. You should expect to see these gone, but none of the others gone. Let’s see how many rows are there. There are 13 rows there. I press Delete. We see the yellow rows have disappeared and we’re left with 11 rows. That worked.
[03:41] Result of clicking on button “Delete Blank-CD”
I reset the sheet now and head back to the left. This Delete_CD_Blanks macro, how does it work? You’ll notice I’ve broken this down using the comments in green here with an apostrophe or quote mark at the beginning, just a single one. Now what I’ve done with these comments is explain the steps we go through.

[03:57] VBA procedure 1 to delete visible rows
The first step is to reset the sheet, and then we’ll apply the auto-filter to the range using this set of lines, and then, we finally delete the visible rows. This is the line you need to use to delete visible rows. We’re just using a range and we’re just going to offset it to avoid deleting the headers.
We’re going to add SpecialCells(xlCellTypeVisible).EntireRow.Delete. What that does is it takes special cells that are cell type visible, anything that’s still visible after you do the filter, it’s going to take the entire row and it’s going to delete it.

[04:43] Press F8 to step into code – run it one line at a time
I’ll step through this line by line. F8 is the shortcut for running through line by line. You can also access that through Debug and Step Into, this F8. I press F8. You see the yellow? That’s where we’re executing. That’s the next line. I’ve just declared a couple of variables. When I call this Reset_Sheet, let me just jump over that, so Debug and Step Over that, so it’s going to run that and it’s going to clear it, but we’re not going to step through all the lines of that.
This is the meat of it. We’re going to set this auto-filter to the data range. This Rng at the moment is nothing. We’re going to set it to be Range A1, so we’re looking at this sheet here, A1, and .CurrentRegion. It’s going to take everything that’s bounded by these blank rows and columns. It’s going to take that whole area from A1 to J14.
I press F8. Then it’s going to check if the auto-filter mode is on, then show all the data. That’s not necessary now because there is no order filter. We apply the range of auto-filter using field 4, which is Column D, field 4, and on that we’ll do the criteria and set the criteria to be equals-nothing. Equals-nothing is going to take all the blanks.
I press F8 there. You see it’s filtered, everything here that’s blank, so no entries inside. Back to the VBA code, we’ve got Rng.AutoFilter, field, 10, and Criteria CD. Field 10, that’s the 10th column, one, two, three, four, five, six, seven, eight, nine, 10, field is 10 and Criteria1 is CD.
When I press F8 over here on the left, on the right you should see it just filtered everything that just says CD. It ignores everything else. Everything else is hidden. At this point, what we want to do is delete these rows, these two rows, because there’s blanks in Column D and CD in Column J.

[06:45] This is the VBA line to delete visible rows
This is the line that’s important. We’ve got the range, and I’ve offset this by one row just so that we don’t delete the header row, and you might want to resize it as well. Depends if you have any data below. I’m assuming there’s nothing in Row 15 or below. Then, the SpecialCells(xlCellTypeVisible).EntireRow.Delete, I’ll press F8, and you see on the right, it’s deleted those two rows.
The last thing that we’ll do is, this worksheet Working, so this here, wks_Working, that’s a codename. You can see on the left here, the codename for the worksheet is wks_Working, that’s a short form in VBA, and the actual name that’s visible to users is Working.
Here in the code, I’ve just used a codename, because a codename doesn’t change in the user interface. We can only change a codename from the VBA editor. This codename wks_Working.AutoFilterMode, I’ve set to False. What that does, on the right, is it un-filters everything. There you go. You see it’s deleted those two rows with CD in Column J and blanks in Column D, and it’s left everything else.

[07:58] Let’s move on to Macro 2 (delete hidden rows)
Right, let’s move on to Macro 2. Macro 2, what we’re going to do is do the same filter, but instead of deleting the visible, what we’re going to delete is the hidden rows. As a quick example of how this works, let me come back to the right here.
I’ll show you the ones that we deleted before this row and this row here. We delete blank CD. This, I’m going to press this button, Keep Blank-CD. I press it. What it does is it keeps those rows as a blank in Column D and have CD in Column J.
[08:26] Result of clicking on button Keep Blank-CD is to delete hidden rows and keep visible rows
Reset the sheet and have a look at the macro. Very similar structure. First step is to reset the sheet. Second step is to apply the auto-filter to the data range. The third step is to delete hidden rows this time instead of visible rows.
I’ll run through this with F8, Step Into, F8, F8. I’ll just step over this, Debug, Step Over, and set this Rng, this range object, to be equal to Range A1 .CurrentRegion, as before. I’ll check if the worksheet Working has an auto-filter on. It doesn’t, so this goes to End If.
Now we’re going to filter for field 4 and Criteria is blank. We’re going to filter again for field 10, which is Column J. Criteria 1 is CD. As before, we read the positions before. In the previous one, what we did is deleted these two rows, Row 7 and Row 9, and then we unfiltered.

[09:28] VBA code to delete hidden rows
From this line we’re going to delete the hidden rows. It’s going to check for each myCell, and myCell is a range object. For each myCell In Rng.Columns(1).Cells, so Columns(1) is that first column here, and all those cells in Columns(1) is going to loop through those one by one and it will check if myCell.EntireRow.Hidden, so if the whole row is hidden, then check if Rng_Del is nothing, then set the range-delete to be myCell, or else, if it already is something, it’s going to set Rng_Delete to be the union, the joining of the previous range-delete and myCell.
Basically what this does is it takes each cell one at a time, it checks if the row is hidden. If the row is hidden, it’s going to add it to this Rng_Delete, and after that, we’re going to delete this Rng_Delete and the entire row. It’s going to add cell by cell those cells which are hidden, and then delete all of them later.
So I press F8 here. That first one wasn’t in, so End If. This one, if myCell.Entire, this is now in Cell 2, is that hidden? Yes, it is. Now it’s hidden, the first it’s going to check is, is Rng_Delete nothing? That’s basically saying, do I have any cells in this? So the answer is no. Okay. In that case, set the Rng_Delete to be equal to myCell, just to start it off.
Next we move on to Cell 3. Is that hidden? Yes, it is, so it’s going to go through this again. Is Rng_Delete nothing? No, it isn’t, because it’s already got a cell. It’s going to jump to this Else statement. With Else, what it’s going to do is set this Rng_Delete to be what already exists there, which is the first cell, and the second cell. It’s going to combine those two ranges together. End If.
What I’ll do is I’ll now skip this through. It’s going to loop through each of those cells and it will be faster. If I just go Debug and Run To Cursor, or we could also press Control-F8, what it’s going to do is run to that cursor line.
Okay. Now it’s gone through all those cells, it’s picked out the ones which are hidden, and now what it’s going to do is check, if not Rng_Delete is nothing, that’s a bit convoluted, but basically it’s saying if the Rng_Delete has something inside it, then, and that’s true in this case because there are cells in that range, what it’s going to do is delete the entire row of Rng_Delete.
At the moment, you might remember, Rng_Del, the Rng_Delete, the range to delete, it only consists of single cells in that first column because we had this Rng.Columns(1).Cells, so it’s just got this Column 1 cells in it. What we’re going to do is specify .EntireRow, which is going to specify the whole rows for each of those cells, and then we’re going to delete.
Press F8 on this to run that line. We’ll un-filter the worksheet, and you’ll see on the right, this is what we’re left with. We only have these two different rows remaining, the ones with blanks in Column D and CD in Column J.

[12:57] I encourage you to hit the like button right now!
Right, we’ve come to the end of this video. What I’d like you to do now is hit that Like button down there, the one down just below this video. Hit the Like button right now, and if you haven’t hit the Subscribe button, also hit the Subscribe button. I’d love you to be a subscriber so you can get more notifications when I create new videos like this.
If you have any questions like this, please just leave a comment on YouTube and I will get to those comments I hope I can use to reach as many people as possible. I’ll try to create more content that is based on your requests, and I’ll do it to as wide an audience I think I can.
If you want a copy of this workbook, you can get a copy of this workbook. A copy of this workbook is going to be available. I’m going to put in the description just below the video. I hope you enjoyed this video. Stick around for more videos just like this. All right, see you soon!
Thanks for watching. For more tutorials on Excel VBA, check out www.launchexcel.com.
Note: You can learn how to use VBA Macros in Excel with my free 28-page e-book. Learn the 3 stage formula for recording your own VBA macros, plus get handy tips.

Related Posts:


Hi, I'm Victor!
Are you struggling with complex Excel tasks? Feeling overwhelmed by spreadsheets that are hard to use?
Many people believe mastering Excel is about learning shortcuts, functions, and formulas. But this overlooks the importance of building practical, real-world applications. It's not just about knowing the tools. It's about using them effectively.
That's where I come in. You'll get a unique perspective to Excel training from me. I have over 20 years of experience at Deloitte and two global tech companies. And I know what can make a difference in your career.
Let me help you integrate Excel into your professional life. Starting today. Read one of my articles, watch one of my videos. Then apply the new technique to your work. You'll see the difference immediately!
Recommended Posts


Discover the PROVEN Blueprint for transforming your Excel skills, supercharging your productivity, and standing out in your career! My course helps you to learn Excel VBA and save hours of time even if you have zero prior experience with programming.

Solve tricky Excel problems and take your work to the next level! Get customized solutions for your unique needs. Save time and gain insights with truly expert Excel solutions from only $97 per task.

Get a clear overview of your project progress using the Excel project timeline. Use it to communicate the big picture, track task progress, and stay on top of your project goals. Stay organized with our project timeline!

Our cheat sheets provide quick and easy reference to commonly used Excel VBA concepts and code snippets.
Unlock new levels of productivity and efficiency with our cheat sheets, and write VBA code like a pro in no time.
RECOMMENDED READING

Are you looking to upskill and stay ahead of the curve? Excel is a powerful tool that keeps growing in demand. We round up the best online courses for learning Excel.

Are you looking to up your spreadsheet game? Excel is an invaluable tool that can help you stay organized and save time. From data analysis to budgets, Excel can do it all!

Today, having Excel skills is more critical than ever. Those who know how to use Excel are more likely to find higher-paying jobs. And get promoted faster.
JOIN FREE EMAIL NEWSLETTER
Step up your Excel game! Join our free email newsletter and get updates on how to become more awesome at Excel.
© 2011-2025 Launch Excel