Automate Your Reports with Excel Macros (Real World Examples)
Last updated on December 18, 2024 ByVictor Chan
If you're an analyst, you likely receive new data every month. Since the data always comes in the same format, macros can help you automate your report preparation.
Imagine that with just a few clicks, your regular reports are done in seconds. I'll show you how to use Excel macros to automate your reporting. It's easier than you might expect, and you'll learn how to transform raw data into a polished report efficiently.
Let's tackle this in four steps, and make sure to stick around to the last step because I'll share a little-known hack that can save you even more time.
Watch every step in my YouTube video tutorial.
Download FREE Excel Workbook
Step 1: Sign up for free Click Here
Step 2: Log in for access Click Here
Step 3: Download file Excel Macro Reporting.zip
Are you new to Excel VBA Macros?
• Find out how to enable and disable macros in Excel with this tutorial
• Save time and effort by copying VBA macros from one workbook to another with these instructions
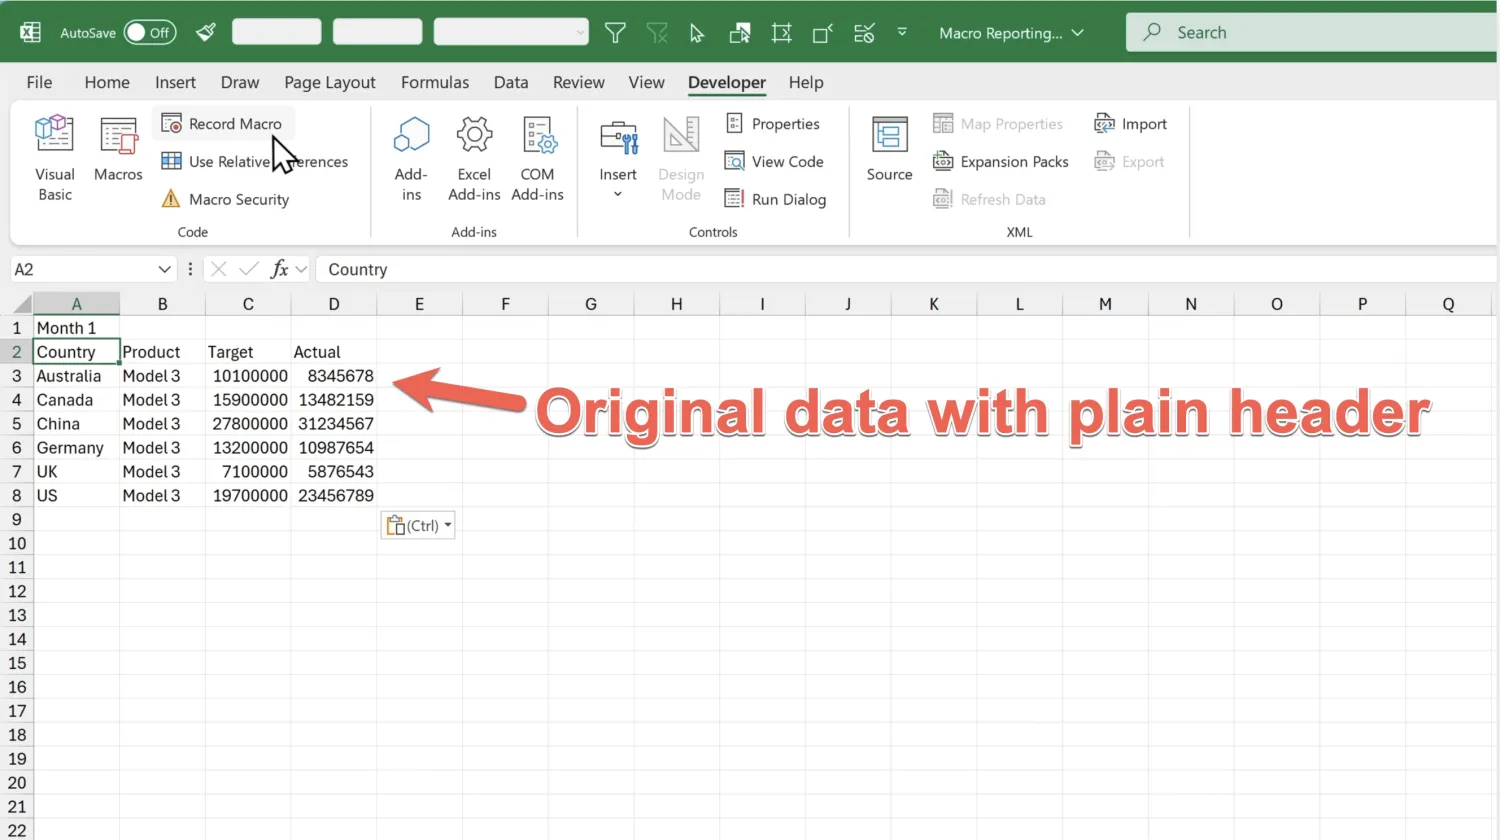
Step 1: Setting Up the Developer Tools and Recording Your First Macro
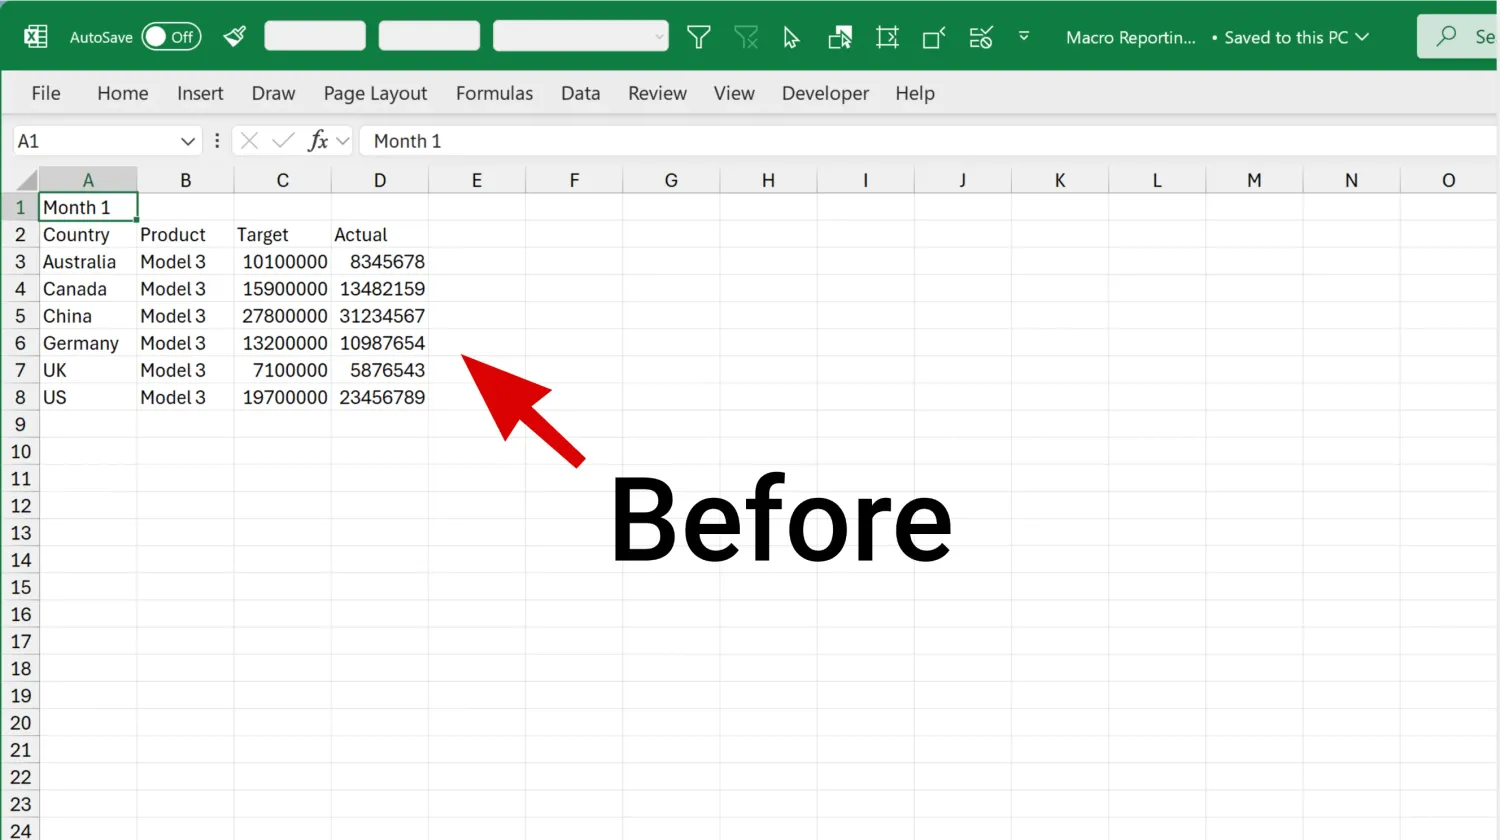
Here’s what we want to achieve with our first macro. We’ll take the plain data and add a nicely formatted header.
Here’s the worksheet with the header applied:

To begin, we need to enable Excel’s Developer Tab to access the tools for recording macros.
1. Right-click on the ribbon and select Customize the Ribbon.
2.On the right-hand menu, check the box next to Developer and click OK.
3.You’ll see a new tab appear on the Excel Ribbon called “Developer”.
Recording the First Macro:
Go to the Developer Tab and click Record Macro.
Name it Step_1_Header (use underscores instead of spaces).
Store the macro in This Workbook.
While recording, take the following actions. If you make a mistake, it’s fine to start over again. Just take your time. Excel will record almost all of your actions.
If you want to watch and follow along with the steps I take, check out my YouTube video.
1. Add spacing: Right-click row 1 and insert a row.
2.Format the header:
Go to the Developer Tab and click Record Macro.
Name it Step_1_Header (use underscores instead of spaces).
Store the macro in This Workbook.
3. Add spacing on the left:
Right-click column A, insert, and adjust the column width to 1.5.
Change the fill color of A1 to blue.
4. Update the text dynamically:
Use a formula in E1: =B1 & " Car Sales (USD)".
Copy and paste as values into cell B1.
5. Click on cell A1. (Optional, but I like to do this to make the macro look neater when it runs)
6. Stop recording the macro (Developer Tab and click Stop Recording Macro)
Test Your Macro:
Open up the Macros dialog box (Developer Tab → Macros). Click on Step_1_Header to run it on new data to confirm it applies the header formatting correctly.
It’s always a good idea to test your macros on “dummy data”.
Since there’s no undo button on recorded macros, it’s also a good idea to save your file before running them.
Finally, an important thing to do is to Save Your Workbook.
Always save as an Excel Macro-Enabled Workbook (.xlsm) to retain the macros.
If you save an an Excel Workbook (.xlsx) you’ll lose your macros!
Step 2: Formatting Tables for Better Readability
Now let’s record a macro to format the table and make it easier to read.
This is what the table looks like after we apply the formatting.

Recording the Second Macro:
1. Go to the Developer Tab.
2.Click Record Macro and name it Step_2_Table.
3.Actions to record:
Click on cell B3 (this is the top left cell of our data).
Select the header range using Ctrl + Shift + Right Arrow and apply formatting: Bold, light blue fill, and Outside Borders.
Use Ctrl + Shift + Down Arrow to select data and apply borders.
Format numbers:
Select numeric cells and apply Comma Style, reducing decimals.
Adjust alignment:
Right-align headers to match the numbers.
Adjust column widths:
Set columns C and B to width 14
4. Turn off gridlines for a cleaner look.2.Click Record Macro and name it Step_2_Table.
Test the Table Macro: Open up the Macros dialog box (Developer Tab → Macros). Click on Step_2_Table to run it on more test data and ensure everything works smoothly.
Of course you can record any formatting steps you want. The steps I’ve shown are suggestions based on the look I wanted to get, but feel free to use your own formatting and colors.
Step 3: Adding a Column Chart for Performance Visualization
In this step, we’ll create a macro to generate a column chart that compares target and actual sales.
This is a combo chart that uses 1. a line with markers for the horizontal “target” bars, and 2. a clustered column for the vertical “actual” bars.

Here are the steps. You can watch the YouTube video for details.
1. Record a macro named Step_3_Column_Chart.
2. Steps to record:
Click on Cell B3.
Select the data range using Ctrl + A.
Click on the Insert tab.
Insert a Combo Chart
Click on the Chart Design tab.
Click on Change Chart type.
Set Target to a Line with Markers.
Set Actual to a Clustered Column.
Format the chart:
Remove the title and adjust series formatting:
Remove the title and adjust series formatting:
Remove unnecessary borders.
Change Target series to horizontal line markers with size 20.
Cut and paste the chart to cell G3.
Adjust column widths for a clean look.
3. Stop recording the macro.
Test the Chart Macro: Open up the Macros dialog box (Developer Tab → Macros). Click on Step_3_Column_Chart to run it on more test data and ensure everything works smoothly.
Troubleshooting Tip: If you encounter a runtime error, it’s probably because Excel didn’t find the chart object that was recorded by the macro recorder. Use the VB Editor (Alt + F11) to remove the problematic line of code and re-run the macro. Watch my video for exactly what to do.
Step 4: Assigning Shortcut Keys for Faster Workflow
After running our recorded macros we transform our plain data into a well formatted report.
This is what the final report looks like:

If you remember, earlier in steps 1 to 3 we opened the Macros menu to run each macro:

This takes a few clicks because after a macro finishes running the Macros dialog box closes and we need to open it again to run the next one.
Can we do it faster?
Yes, it turns out we can run our macros by assigning keyboard shortcuts, so we don’t need to open the Macros menu every time we want to run our macros.
Here’s how:
1. Go to Macros and select a macro (e.g., Step_1_Header).
2. Click Options and assign a shortcut key. I recommend using CTRL + SHIFT combos because they tend not to clash with existing Excel shortcuts.
3. Let’s assign the following shortcuts to our three macros (Q + W + E are conveniently close together on the keyboard so we can run the macros one after another without moving all over the keyboard)
Step 1: Ctrl + Shift + Q
Step 2: Ctrl + Shift + W
Step 3: Ctrl + Shift + E
4. Use this mnemonic to avoid reserved shortcut combos: F.L.O.A.T.U.P. (the letters F, L, O, A, T, U, P are already used in Excel shortcuts).
Ctrl + Shift + F Opens the Format Cells dialog box with the Font tab active
Ctrl + Shift + L Toggles the AutoFilter on and off
Ctrl + Shift + O Selects all cells containing comments (or ‘notes’ in Excel 365)
Ctrl + Shift + A Inserts function arguments after typing a function name
Ctrl + Shift + T Toggles the Total Row in an Excel Table
Ctrl + Shift + U Expands or collapses the formula bar
Ctrl + Shift + P Opens the Format Cells dialog box with the Font tab active (yes same as F)
If you don’t use any of the above shortcuts, you don’t need to worry about assigning them to your recorded macros. Just go ahead and use them!
Unlock Excel’s Full Automation Potential
With these four steps, you can automate your Excel reports and save hours of time every week.
But remember, macros are just the beginning. If you want to learn how to unlock the full power of automating Excel using VBA, check out my online course. It's helped over 500 students master Excel Macros and VBA in weeks, not years.
Learn more by clicking here.


Hi, I'm Victor!
Are you struggling with complex Excel tasks? Feeling overwhelmed by spreadsheets that are hard to use?
Many people believe mastering Excel is about learning shortcuts, functions, and formulas. But this overlooks the importance of building practical, real-world applications. It's not just about knowing the tools. It's about using them effectively.
That's where I come in. You'll get a unique perspective to Excel training from me. I have over 20 years of experience at Deloitte and two global tech companies. And I know what can make a difference in your career.
Let me help you integrate Excel into your professional life. Starting today. Read one of my articles, watch one of my videos. Then apply the new technique to your work. You'll see the difference immediately!


Discover the PROVEN Blueprint for transforming your Excel skills, supercharging your productivity, and standing out in your career! My course helps you to learn Excel VBA and save hours of time even if you have zero prior experience with programming.

Solve tricky Excel problems and take your work to the next level! Get customized solutions for your unique needs. Save time and gain insights with truly expert Excel solutions from only $97 per task.

Get a clear overview of your project progress using the Excel project timeline. Use it to communicate the big picture, track task progress, and stay on top of your project goals. Stay organized with our project timeline!

Our cheat sheets provide quick and easy reference to commonly used Excel VBA concepts and code snippets.
Unlock new levels of productivity and efficiency with our cheat sheets, and write VBA code like a pro in no time.
RECOMMENDED READING

Are you looking to upskill and stay ahead of the curve? Excel is a powerful tool that keeps growing in demand. We round up the best online courses for learning Excel.

Are you looking to up your spreadsheet game? Excel is an invaluable tool that can help you stay organized and save time. From data analysis to budgets, Excel can do it all!

Today, having Excel skills is more critical than ever. Those who know how to use Excel are more likely to find higher-paying jobs. And get promoted faster.
JOIN FREE EMAIL NEWSLETTER
Step up your Excel game! Join our free email newsletter and get updates on how to become more awesome at Excel.
© 2011-2025 Launch Excel